Have you received your first countertop ice maker? Don’t know how to set up and start it for the first time?
Don’t worry… I am here to help you!
In this guide, I will teach how to install a countertop ice maker and get it ready for the ice-making process.
Check this-
1. Why does my ice maker make a knocking sound
2. How to reset igloo ice maker
3. How to make clear ice at home
Table of Contents
What is a countertop ice maker and how does it work?
Countertop ice makers are great alternatives to refrigerator ice makers. It’s much better than a refrigerator ice maker in terms of ice quality, ice production rate, and power efficiency.
Countertop ice maker provides you the flexibility to take it outdoor and organize a poolside party or backyard party. It comes in various sizes, types, and prices. Depending on your budget and requirement, you can pick the right one for you.
Such ice makers are highly portable and occupy less space in your kitchen. It also produces soft and crunchy ice in barely 8-10 minutes.
Just like your refrigerator, a countertop ice maker contains a compressor, condenser, expansion valve, and refrigerant. The following thermodynamic process takes place.
Compression
When you plug the machine into a power socket, the compressor increases the pressure and temperature of the refrigerant gas.
Condensation
This high-pressure, high-temperature gas passed through a condenser unit (a fan fixed on the back) where gas drops its temperature to just above the atmospheric temperature.
Expansion
Now the refrigerant goes through an expansion valve where pressure is dropped, and due to the thermodynamic process, the temperature is also dropped. Also the phase of refrigerant changes to a liquid (due to a drop in pressure and temperature).
Evaporation
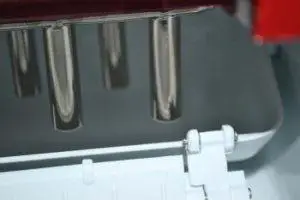
Once the machine gets low-temperature liquid refrigerant, it passes through a pipe where some rods are exposed outside. And a motor brings the water bucket close to it, and rods are exposed to the water.
Now, due to extremely low temperature (almost -18° to -20° centigrade), the water starts freezing around the rods/tubes exposed in the water bucket.
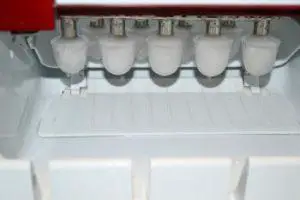
After a few minutes, the machine runs a reverse cycle (heated the rod), and ice cubes drop in to the ice bucket. The process continues till the ice basket is full of ice cubes.
When the ice basket is filled with ice, an infrared sensor sends the signal to an electronic control unit, and the machine stops making ice.
This is how a countertop ice maker works.
Now let’s move to the installation process of the countertop ice maker.
How to install a countertop ice maker?
The installation process of countertop ice makers is very easy. There is no complicated process involved like refrigerator ice makers.
Follow these steps to install countertop ice maker-
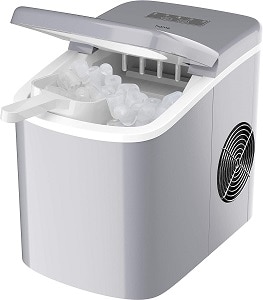
1. Place the ice maker on a counter
If you’ve received your countertop ice maker, then remove it from the box and place it on your kitchen counter. Make sure that at least 5-6 inches of space is there from all sides. It helps the ice maker release the heat and keeps the components cool.
2. Fill the water
It’s advisable to add some lemon juice or vinegar to the water and fill the water reservoir. This will remove any dirt and eliminate the chance of cloudy ice.
3. Plugin into a power source
Now, your ice maker is ready to make ice. Insert the ice maker plug into a power source.
4. Run a few cycles
Now run the ice maker for at least 3 cycles, so that lemon juice removes any dirt or scale from the parts. Throw all the ice cubes made in this process.
5. Drain the water
Now drain the excess water and wash the reservoir. You can use a soft cloth to wipe the ice maker rods and water reservoir. Do not forget to remove the plug from the power source.
6. Fill the fresh water
Once again, fill the reservoir with fresh water. Run for at least 5-6 cycles and throw the ice cubes made during this.
7. Enjoy the ice cubes
After 5-6 cycles, you can enjoy the odorless, soft, and crunchy ice in your drinks.
Note– If your ice maker starts making cloudy ice, you can repeat the same process after 2-3 months. You can read my ice cleaning guide for more details.
Final Verdict
Generally, the company claims no installation is required for countertop ice makers. It’s true to many extents, but you should follow the above process to get tasteless and odorless ice cubes right from the start. I have explained the complete process to install a new countertop ice maker for the first time.
Enjoy your drinks with soft and crunchy ice cubes.