Chilling on your couch on a hot summery day is incomplete without shaved ice and shaved ice treats. Whether you are sitting by the pool, having fun with your family or even watching television, shaved ice fits every occasion perfectly.
The good news is that you can now make shaved ice at your home itself and enjoy the delicious treats. If you do not have a machine for making shaved ice, do not worry because we have got your back. We have come up with some innovative ways that will teach you how to make shaved ice easily.
Get ready to put your chill mode on and enjoy the summer while it lasts. These hassle-free methods are just what you need to make your day special and flavorful. Without any further ado, let’s get started and look at some easy ways of making shaved ice at home.
Table of Contents
How To Make Shaved Ice At Home?
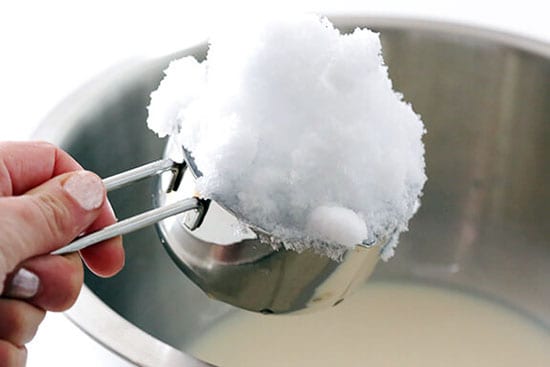
If you don’t have a shaved ice maker, then follow these methods to make shaved ice at home.
1. Crush the ice
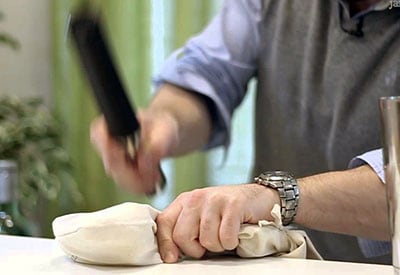
This is one of the simplest methods of making shaved ice at home. For this technique, you will require a Ziploc bag, a mallet, and a rolling pin. Start by filling about a quarter of the Ziploc bag with water and seal it nicely. Ensure that the Ziploc bag lies flat on the ground.
Put this bag into the freezer and let it sit there undisturbed for a few hours. After the ice is ready, take out the Ziploc bag and use a mallet or a rolling pin for pounding. Keep pounding the ice till you receive the desired texture as well as hardness.
Empty the Ziploc bag in another utensil and add syrup, condensed milk, or other flavors that you like. Remember that the consistency of the shaved ice depends on how you use the tool. Apart from being an easy and quick method, this process is also a great stress buster for everyone.
2. Shave the ice with knife
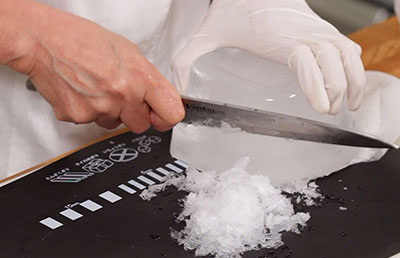
Yes, you have heard it right! You can make shaved ice at home using a sharp knife. Instead of investing in expensive machines, you can use this technique to make shaved ice treats.
For this method, you will need a sharp knife, a clean cloth, gloves, and a container or ice mold.
First of all, you will have to create a block of ice. Fill the square container or ice mold with water halfway and let it freeze.
After the water is frozen, take it out of the freezer and thaw the ice for a couple of minutes. Place the cloth on a stiff and smooth surface and put the ice on this cloth.
Wear gloves for your safety to prevent ice burns and carry out the process comfortably. Start slicing the knife in fast motions and scrape the ice into another utensil.
Prepare this shaved ice with your favorite syrups and topping and your delicious treat is ready to eat. What we love the most about this method is that the texture of the shaved ice is of supreme quality.
3. Use ice pick
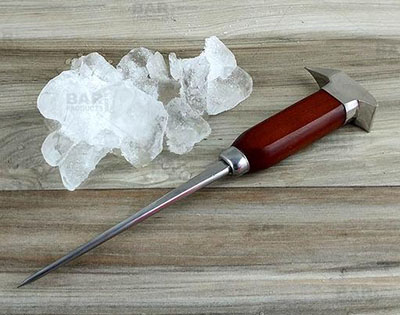
If you wish to have finely shaved ice of great consistency then this method is just for you. This is the next method on our list and you require an ice pick, cloth, a Ziploc bag, or an ice mold. Take a container, mold, or Ziploc bag and fill it with water.
Let the water freeze and take it out when it is ready. Next, take a clean cloth and put it on a smooth and sturdy surface. Now take out the ice block and place it on this piece of cloth.
We recommend that you first start by pounding this ice block instead of directly using an ice pick to chip it. When you have crushed ice, you can then use this ice pick to make it even better.
Otherwise, you can chip the ice block first and then crush it with a mallet or a rolling pin, whatever feels right to you.
Be careful while working with an ice chip as it can slip and hurt your hand. Wear a glove to maintain a grip during this entire process. Once the shaved ice is ready, top it with your favorite ingredients and enjoy it.
4. Use a fork
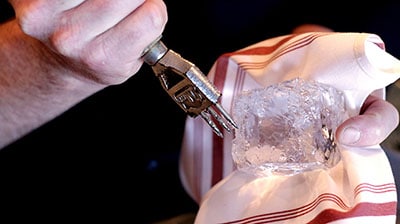
Not everyone is comfortable using a knife or an ice pick as they can be dangerous if not used with care. If you are one of those people then you can use a fork to make shaved ice at home. You just need a sharp fork, a container, or a mold.
The first step would be to fill the ice mold or the container with water halfway. Put it in the freezer, let it sit for 5-6 hours, and then take it out when ice is formed perfectly. Remove the block ice from the mold or the container and let it adjust to room temperature.
Put a thick cloth on a smooth surface that will prevent the ice from slipping. While the block ice is tempering, wear gloves to prevent your hands from getting ice burns. Now, take the fork and start shaving the ice quickly in repetitive motions.
Using a fork is better than using a knife as it is much safer. Although this method is easy, it still takes a good amount of time for the ice shavings to get ready. Be patient and do not rush out the process.
Some other methods to make shaved ice at home
Apart from the above-mentioned methods, you can always invest in a machine that will give you perfectly shaved ice at home within no time.
However, if you are not willing to spend so much on a machine then these methods are perfect for you.
Also, you can use a manual ice shaver to create shaved ice. Since ice shavers are not a common appliance in every household, it is a less used method.
Repeat the steps mentioned in the above methods to form block ice. Once it is ready, use this manual ice shaver to scratch the ice.
Moreover, ice shavers are compact and do not require electricity so they are great for you if you love shaved ice treats.
All these methods can not be mastered in one trial so make sure you practice them to get finely shaved ice at your home. Be careful while working with the tools and take safety precautions first.
Bottom Line
This was all about how to make shaved ice at home easily. Quickly try out these procedures and make some tasty treats for yourself and your family.
Enjoy your summers with shaved ice and make your days flavorful. Indulge in some do-it-yourself (DIY) activities and make your favorite treats effortlessly.
